SONATA - A Toolkit to Generate Social Navigation Datasets and HRI
Contributors: Rishabh Baghel, Aditya Kapoor, Pilar Bachiller, Ronit R. Jorvekar, Daniel Rodriguez-Criado and Luis J. Manso
Social navigation datasets are necessary to assess social navigation algorithms and train machine learning algorithms. Most of the currently available datasets target pedestrians’ movements as a pattern to be replicated by robots. It can be argued that one of the main reasons for this to happen is that compiling datasets where real robots are manually controlled, as they would be expected to behave when moving,is a very resource intensive task. Another aspect that is often missing in datasets is symbolic information that could be relevant, such as human activities, relationships or interactions. Unfortunately, the available datasets targeting robots and supporting symbolic information are restricted to static scenes. Our approach argues that simulation can be used to gather social navigation data in an effective and cost-efficient way and presents a toolkit for this purpose. A use case studying the application of graph neural networks to create learned control policies using supervised learning is presented as an example of how it can be used.
The toolkit is used to generate the dataset by simulating the scenarios for robot’s navigation in a social setting. We show an usecase of this data collected from the toolkit by converting into graphs and feeding it into the GNNs to predicts the robot’s path in a given scene.
Format of the collected data
The data collected from the toolkit comprises of the following for a given entity:
- Co-ordinates
- Velocity with respect to the robot
- Type of interaction betweeen the two entities
- Orientation
- Size
The data is stored in the form of JSON files, with the following structure:
"timestamp": 1598462029.7540903,"walls": [   {       "x1": 5.64804220199585,       "x2": 4.9704155921936035,       "y1": 4.951876163482666,       "y2": -1.009736180305481   },   {       "x1": 4.970417499542236,       "x2": -0.991195559501648,       "y1": -1.0097349882125854,       "y2": -0.3321133852005005   },   {       "x1": -0.991193413734436,       "x2": -0.3135751187801361,       "y1": -0.332114040851593,       "y2": 5.629499435424805   },   {       "x1": -0.3135727047920227,       "x2": 5.648040294647217,       "y1": 5.629498481750488,       "y2": 4.951875686645508   } ],
"command": [  -0.06999999843537807,  0,  0.25999999046325684],"goal": [  {    "x": 0.9240278005599976,    "y": 3.107682704925537  }],"interaction": [  {    "dst": 2,    "relation": "human_laptop_interaction",    "src": 1  }],"objects": [  {    "a": 0.11155806481838226,    "id": 2,    "size_x": 0.8999996185302734,    "size_y": 0.800000011920929,    "va": 0.0016205161809921265,    "vx": 0.006066322326660156,    "vy": -0.005913734436035156,    "x": 3.3170711994171143,    "y": 3.743642807006836  }],"people": [  {    "a": -1.458441972732544,    "id": 1,    "va": 0.0016202926635742188,    "vx": -1.5497207641601562e-05,    "vy": -0.005223274230957031,    "x": 2.8968095779418945,    "y": -0.007299661636352539  }]
How to run the default tool
Prerequisites
Before installing the tool, it is necessary to have this software installed in your computer:
- PyTorch
- DGL
- PyTorch Geometric
- PyRep (This link would also help in the installation of CoppeliaSim)
- Robocomp
Installing and running
After cloning the directory, execute the following commands to move the interfaces to the proper location:
cp interfaces/* /opt/robocomp/interfacescp interfaces/* /opt/robocomp/interfaces/IDSLsAns then run the tool with:
bash run.shUsing SONATA GUI
After you run the above commands the SONATA GUI opens up. Follow the following steps to start generating your data:
-
Write the contributor’s (user’s) name so that the data saved can be marked by the users name.

-
After this the simulation will start with a green tint, and until the mouse controller is clicked robot will not move.
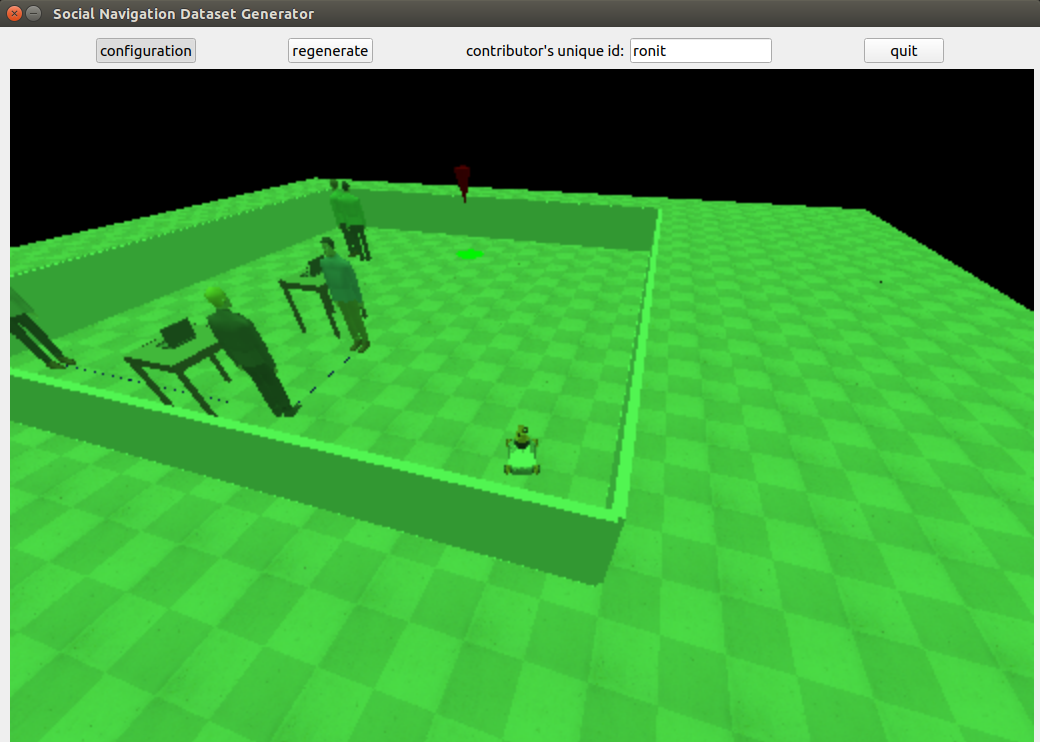
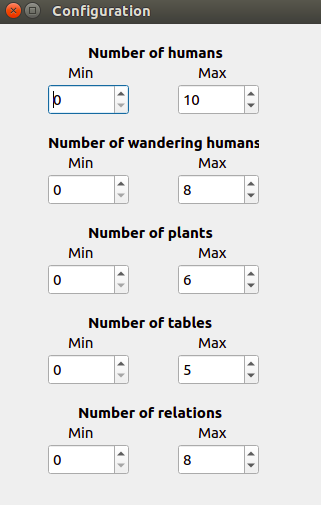
-
Select the configuration from the top bar of the SONATA GUI to select the range of different entities you want to add in the scene. You can also regenerate a scene if you don’t like the settings of entities by using the regenerate button from the top bar. We also provided blue lines between two entities to show that they are interacting with each other.
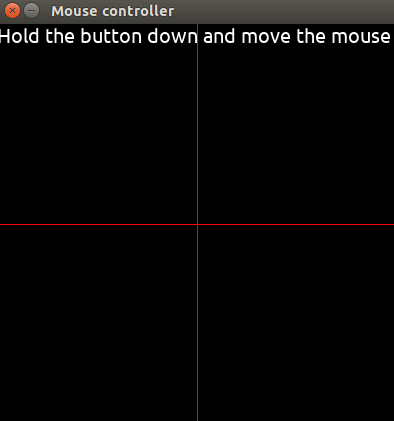
-
Click on the mouse controller and hold the left key and drag the mouse to move the robot in that direction.
-
Move the robot to the goal marked by the cone.
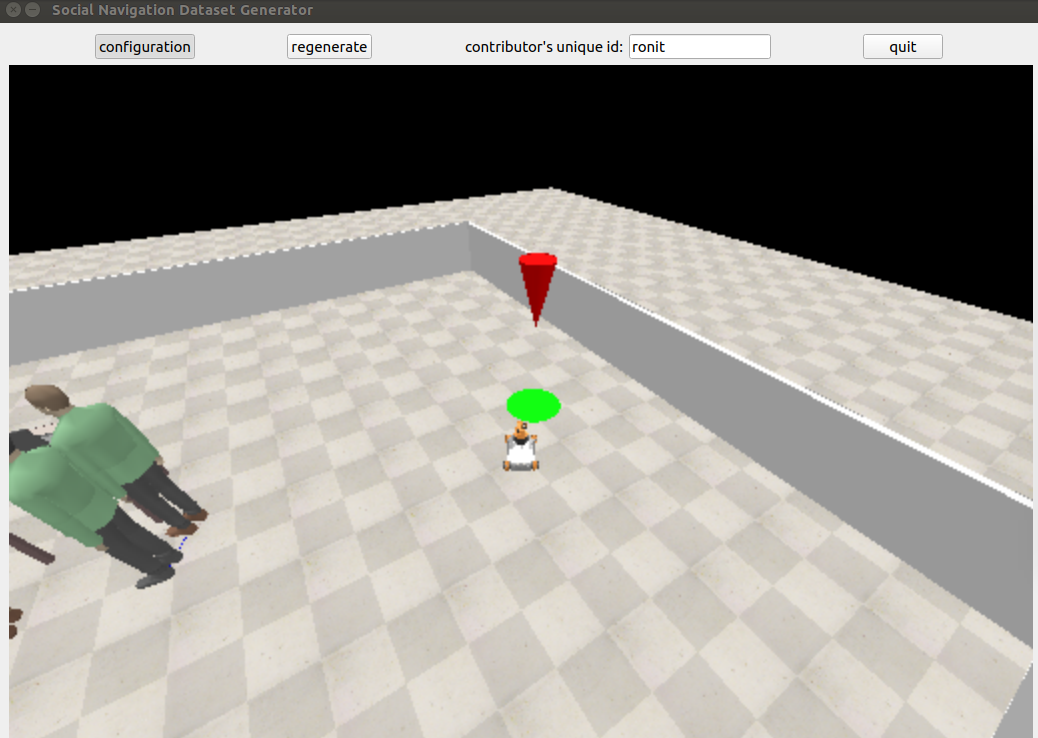
-
Save your data.
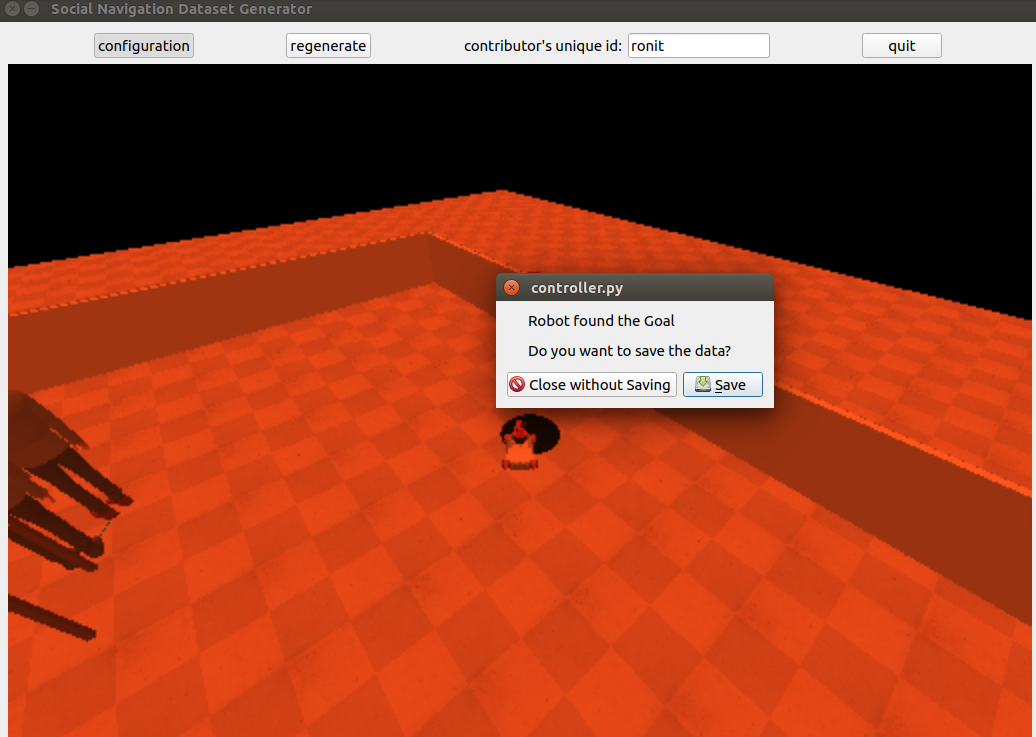
After you click and save the data, a JSON file is generated and the full episode gets saved with timestamps. For the usecase we take these JSONs and convert them into graphs using socnavData data loader, which is then fed into the GNNs. Once the model is trained you can run the toolkit in test mode by setting TEST_MODE boolean to true in the controller’s specificworker.py file.
Tutorial: Customize SONATA
SONATA’s main components are the Controller, Joystick, and Simulator. All the changes that needs to be done are in the src/specificworker.py file of these components. For adding/changing a new objects in the scene, python/coppeliasimapi2.py needs to be modified, for interacting or controlling the behavior of these objects you can make changes in python/sonata.py module.
Add a new object to the scene
Let’s assume you want to add more than one goal in the scene, for that you need to make another goal object in python/coppeliasimapi2.py.
1class NewGoal(object):2   def __init__(self, x, y):3       super(NewGoal, self).__init__()4       ss1 = Shape.create(type=PrimitiveShape.CONE,5                             color=[1,0,0], size=[0.4, 0.4, 0.75],6                             position=[x, y, 2.5],orientation=[3.14,0,3.14])7       ss1.set_color([1, 0, 0])8       ss1.set_position([x, y, 1.5])9       ss1.set_orientation([3.14,0,3.14])10       ss1.set_dynamic(False)11
12       self.handle_add = ss113
14       ss2 = Shape.create(type=PrimitiveShape.CONE,15                             color=[0,1,0], size=[0.75, 0.75, 0.0015],16                             position=[x, y, 0.000],orientation=[3.14,0,3.14])17       ss2.set_color([0, 1, 0])18       ss2.set_position([x, y, 0.000])19       ss2.set_orientation([3.14,0,3.14])20       ss2.set_dynamic(False)21       self.handle = ss222       self.handle.set_model(True)23
24   def get_position(self, relative_to=None):25       return self.handle.get_position(relative_to=relative_to)26
27   def get_orientation(self, relative_to=None):28       return self.handle.get_orientation(relative_to=relative_to)29
30   def get_handle(self):31       return self.handle._handle32
33   def remove(self):34       self.handle.remove()35       self.handle_add.remove()36
37   def check_collision(self, obj):38       return self.handle.check_collision(obj)39
40   def get_model_bounding_box(self):41       return self.handle.get_model_bounding_box()
After this you need to call this NewGoal() object in the python/sonata.py module in def room_setup().
Citation
To cite this work, use the following BibTex notation:
@InProceedings{10.1007/978-3-030-62579-5_13, author="Baghel, Rishabh and Kapoor, Aditya and Bachiller, Pilar and Jorvekar, Ronit R. and Rodriguez-Criado, Daniel and Manso, Luis J.", editor="Bergasa, Luis M. and Oca{\~{n}}a, Manuel and Barea, Rafael and L{\'o}pez-Guill{\'e}n, Elena and Revenga, Pedro", title="A Toolkit to Generate Social Navigation Datasets", booktitle="Advances in Physical Agents II", year="2021", publisher="Springer International Publishing", address="Cham", pages="180--193", isbn="978-3-030-62579-5"}